


How to germinate marijuana seeds
List of contents
At Alchimia Grow Shop we try to maintain an extensive and complete catalog of seeds, always keeping stocks as fresh as possible to thus achieve the best germination percentages.
To do this, we renew our stock and we do not let any packet of seeds stay in our refrigerators for more than six months, which allows us to assure you that our seed packets never reach six months of storage. Of course, inside the refrigerators, there is a controlled atmosphere (low temperature and ambient humidity). Even so, from time to time, germination problems can appear, sometimes caused by problems such as harvesting the seeds too early, but many others due to mistakes made during the germination process. In this article we show you how to germinate cannabis seeds in 4 different ways, also seeing the effectiveness of each of the 4 methods.

How to germinate cannabis seeds
Seed germination is a simple but crucially important process to start a crop in the best possible way. There are many different ways to germinate marijuana seeds, all of them correct, although as we will see in this article, some systems can cause more complications than others. Whether the plants are intended for indoor or outdoor, organic or hydroponic crops, we must follow a few simple steps that will ensure correct and rapid germination of our seeds as far as possible.
In this article we are going to teach you different ways to germinate your seeds, each one with its peculiarities but all of them effective. In addition, by using different germination methods, you will be able to determine which of them will work best in your space and cultivation system, as we will indicate the strong - and weak - points of each of them.

Bases for germinating marijuana seeds
First of all, we are going to give a brief review of the conditions required for a fast and correct germination. Logically, the first thing that we are going to have to provide to our seeds to stimulate their germination is humidity, that is, water. Unless the tap water comes out with an EC that is too high (from 1) we can use it without problem. Otherwise, a small amount of distilled or osmosis water will help us. Many growers often add a few drops of hydrogen peroxide (hydrogen peroxide) to the water they will use to germinate; In this way, the water has a higher oxygen content, in addition to taking advantage of the antifungal properties of hydrogen peroxide and reducing the possibility of fungi appearing during the process. The pH of the water should be around a value close to 6, with a temperature of about 22ºC, and root complexes or stimulators can also be added, although they are not necessary at all.
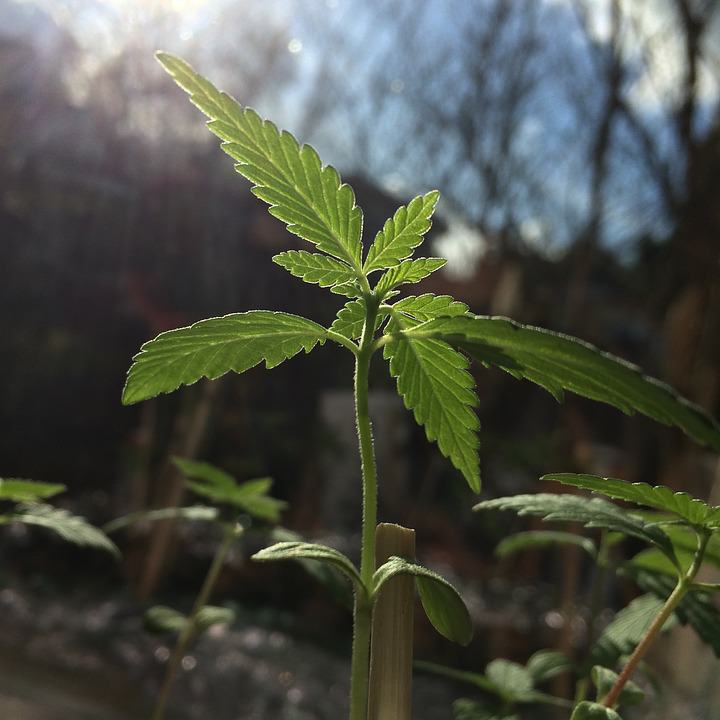
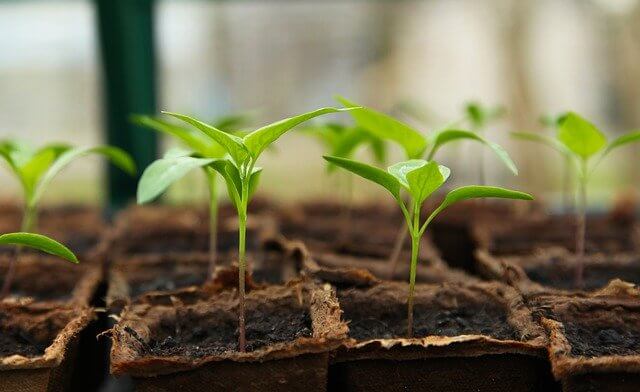
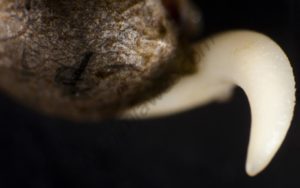
Next, we must choose a medium for germination; As we will see below, we can use the popular jiffy (pressed peat or coconut tablets), rockwool cubes, paper napkins, or RootIt propagation plugs. Once we know what water and medium to use, we must take into account what is the best environment for our seeds to germinate. Ideally, until the plants are born, keep them in a dark, humid (although well-ventilated), and relatively warm place, around 25ºC will be perfect. For this reason, many growers use small propagators with the chosen propagation medium inside. In the case of using kitchen paper, these conditions must be maintained until the seeds germinate, that is, until we see how the seed opens and the radicle appears, which will later become the main root of the plant. Once the radicle has grown about one centimeter, we can plant the seed and in a few days (sometimes hours) we will see our little seedling born. On the other hand, and as we will see, we can skip the step of previously germinating the seed in kitchen paper and planting it directly in a propagation plug or seedbed.
Let us now see what are the main characteristics of the most commonly used germination media.

Substrates and media for germinating cannabis seeds
These are the germination media that we are going to use in this article. Remember that these mediums are going to be hydrated with the water that we have mentioned before:
- Peat Moss Jiffy: These are dehydrated and pressed peat pills. They should be left to soak for a while until they become a small cloth bag full of substrate. On many occasions (as we will see here) the seeds are sown without prior germination directly into the jiffy, where they will germinate and sprout. Once this moment has arrived, they are transplanted into a pot to begin the growth phase. You can find jiffys of various sizes, as well as coconut fiber instead of peat. One of its main advantages is that, by retaining a good amount of water, they do not need to be hydrated again during the germination process.
- Rockwool: Rockwool cubes or blocks are the ideal germination medium in case you want to grow the plants in hydroponic or aeroponic systems, as they will not dirty the system with remains of peat or coco, as happens when using jiffys. Seeds germinate very quickly on this medium, although the moisture level of rockwool should normally be watched, as it dries out much faster than a well-hydrated jiffy. Thus, every day we must check that the rockwool is wet, hydrating it if necessary.
- RootIt propagation plugs: These are fully biodegradable and organic rooting sponges with an exceptional texture for root development, also widely used for rooting cannabis cuttings. They retain the ideal amount of water and oxygen, providing excellent results. They are used in much the same way as rockwool plugs.

- Kitchen paper: Many times replaced by cotton, it is one of the most used means to germinate seeds of any plant. It is about putting the folded kitchen paper in a container (a plate, for example) and moistening it. The more paper you put in, the more moisture will be retained and the less the paper will need to be hydrated during the process. Once wet, place the seeds on top and cover them with a thin layer of paper (on many occasions this last step is ignored), after which the plate is covered with another of the same size, always leaving a space between them so that the seeds seeds "breathe". As with the rock wool, we will be careful that the medium - in this case the paper - never dries out during the process.
- Others: Of course, the seed can also be planted directly in a pot or in the ground, in the case of outdoor gardens. Even so, we do not recommend this option, especially since the seed can be buried too deep, especially if it must be watered after it has been planted and before it has born. If this happens, the risk that the plant will never be born is high. That is why it is so important to water the substrate before introducing the seed. Sometimes the seeds are put in water for 24 hours to stimulate germination before planting them in the chosen medium.
Let's now observe how 24 Green House Seeds Cheese seeds behave with each of these media.
How to germinate marijuana seeds step by step
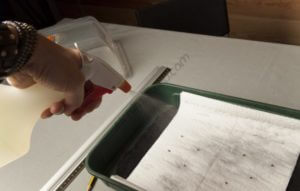
We will start by preparing all the necessary materials and always maintaining proper hygiene in the work environment. We will test each of the mentioned media and systems with lots of 6 seeds for each one. We hydrate the jiffy, the rockwool cubes and the RootIt plugs with water and Green House Feeding Enhancer, which will ensure a pathogen-free process and spectacular root production (as you will see, this product dyes the water a very dark color , so that the stone wool appears almost black).
- Germinate seeds in peat moss: We hydrate the jiffy by leaving them in water for 15 minutes. Once they have swollen, we drain them a little and make a small hole no more than 1cm deep, where we always put the seed with its crown facing up. We cover the hole loosely with peat and leave our jiffy in a warm, airy place, but away from drafts (sometimes they are put inside small plastic greenhouses with open vents). In a few days, the small seedlings emerge from the substrate, at which point we can transplant them into a pot. With this system, our plants took a total of 3 days to be born.

- Germinate seeds in rockwool: We hydrate the rockwool cubes just like the jiffys, which as you will see takes much less time than with the latter. Drain them slightly and insert the seed in the same way as in the previous case, with the crown facing up. Rockwool can dry out in hours depending on environmental conditions, so we may need to hydrate it every day. The aforementioned propagators are ideal for maintaining a rather high degree of humidity, which makes the wool take longer to dry (some even include heating). Once the plant has been born, we can proceed to transplant it to the chosen substrate or hydroponic system. With this method, our plants took a total of 3 days to grow.
- Germinate seeds in RootIt plugs: We follow the exact same method as with the rockwool plugs. With this technique, our plants took a total of 4 days to be born.
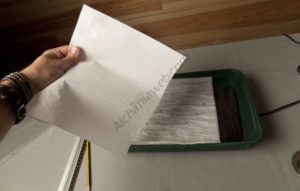
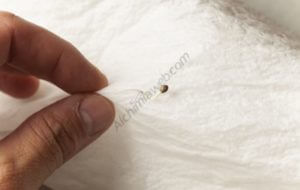
- Germinate seeds on kitchen paper: We take a couple of kitchen papers and fold them a couple of times to get a good bed for our seeds. We put the paper in a deep plate or similar and hydrate it. Next, we deposit the seeds on it and cover them with a layer of paper. We use another plate as a lid but leave a slit open where fresh air can enter. This method is usually used in combination with one of the two mentioned above; once we see the radicle appear from the inside of the seed, we insert it into a jiffy, into a rockwool cube or propagation plug as we have explained; in a few days (perhaps hours) the seedling will be born. For this article we have germinated 6 seeds with kitchen paper and we have left them until they have practically come off the seed shell, at which time we should plant them.
Conclusions about seed germination
We summarize below the results of our test bench dedicated on this occasion to seed germination. We counted the number of days from when the seed began to germinate until the seedling showed signs of having germinated and sprouting from the substrate. As you have seen, the difference has been practically zero, the 4 methods being highly effective also thanks to the freshness of the seeds. Here you can see how long it took the seeds to germinate in each medium, and how many of them grew without problem:
- Jiffy: 3 days, 6 of 6 seeds germinated
- Rockwool: 3 days, 5 of 6 seeds germinated
- RootIt Tacos: 4 days, 6 of 6 seeds sprouted
- Kitchen paper: 3 days, 6 of 6 seeds germinated
- Total: 23/24 germinated seeds, 96% germination
Whichever method you end up using, always remember that it is very important not to bury the seed too deep, as well as not to over-saturate the medium with water. It is not necessary that the water that we are going to use for this process is fertilized, since the cotyledons of the seedlings have enough food stored so that it can pass the first days without nutrient deficiencies. In case of using hydroponic systems, the newly germinated seedling can be inserted into the system once it has born. As has been proven, the germination medium does not normally matter much, while much of the success lies in fresh and correctly stored seeds.

Sometimes it can happen that the seedling finds it difficult to separate the cotyledons, either the seed shell sticking to them or only the thin membrane (cuticle) that surrounds them. In this case, we proceed with very clean hands (or gloves) to carefully remove the cuticle, separating it from the cotyledons and allowing them to open. When transplanting the propagation plug with the seedling already born into a pot or into the ground, it is advisable to bury as much of the stem as possible, from where new roots will grow.
We hope this article has been useful to you and helps you choose the system that best suits your needs.
Happy harvest!