


Growing autoflowering cannabis
List of contents

Autoflowering cannabis is on the rise. A lot of growers - whether because of plant size, growth speed or ease of cultivation - grow autoflowering marijuana during the outdoor season, in addition to growing regular or feminized marijuana plants.
How to grow autoflowering marijuana plants
Here we will try to show you the best way to grow autoflowering plants, so you get the best quality and yield out of your plants. Mikromachine from Kannabia seeds was used in this crop, grown in 18 and 11 litre pots. They were grown in Biobizz Allmix soil, which already contains the necessary nutrients for the first weeks of life of our plants, so we don't have to worry about the overall nutrition of the plants.

It is important to ensure that, during the first phase of its life, the plant is neither overfertilised nor overwatered, as it can have a very negative impact on our autoflowering plants. This kind of stress on plants will result in their growth period being seriously affected, not developing as much as they should.
When you start your crop, the first step is planting the seeds in jiffy pellets. Once they have germinated and grown (when they become a seedling), transplant them to a 18 litre pot, which is especially designed for autoflowering plants, being taller than wider.
It is important to take into account the shape of the pot. Autoflowering cannabis can grow more or less depending on its cultivation. Autoflowering marijuana plants have limited growth due to several factors, the most important being the autoflowering gene that makes them flower when they have reached sexual maturity.
However, this gene is activated by some factors that make plants to reach it more or less quickly. The most important factor to consider is the amount of substrate used to grow autoflowering cannabis, and how it is distributed on the plants. It is important to stress that autoflowering plants start flowering when their roots reach the bottom of the pot. The longer it takes for the root of the plant to reach the end of the pot, the taller the plant will be, so you will get a higher yield.
Materials needed for the cultivation:
- Biobizz All Mix soil
- 18 litre autoflowering plant pot
- Basic fertiliser: Naturcannabis growth and flowering
- Complementary fertilizers: Aptus kit set pro (Regulator, Startbooster, Topbooster, K-Boost, P-Boost, Ca-Mg Boost)
- Other additives: CALGreen, Amino roots
- GHE Trichoderma Harzianum

Start of growth period
To get started, we germinated Micromachine and Speedy Gonzales seeds from Kannabia, planting them directly in 18 litre pots. These pots, as explained before, are deeper than wider so they are ideal for growing autoflowering cannabis. We used quality soil containing enough fertiliser for the entire crop, so that liquid fertilisers were not needed.
The growth period of these plants is very limited, from 2 to 3-4 weeks inluding the stretching period (growth after flowering). However, their growth can vary widely depending on how the plants have been grown.
At the beginning of the growing period, when plants were still very small, they were watered using a small amount of water, no more than 330 ml per pot and plant, using a nutrient solution consisting of: 1.5 ml/10 litres Regulator, 1 ml/l Naturcannabis growth, 2.5 ml/10 litres Startbooster, 8 ml/10 litres Amino Roots, Trichoderma Hazarium, 1 ml/l CALGreen.
Watering was done using the same amount of nutrient solution for much of the growth period. This has a positive impact on the root growth of plants leading to a better development of the aerial part of the autoflowering cannabis plants. Over the first week of life, the plants are all well sized.

After one week, the rootball gets bigger and the plant can absorb more nutrients than before, so you will be able to slightly increase the amount of nutrient solution, from 330 ml every other day to 500 ml, using exactly the same dosages.
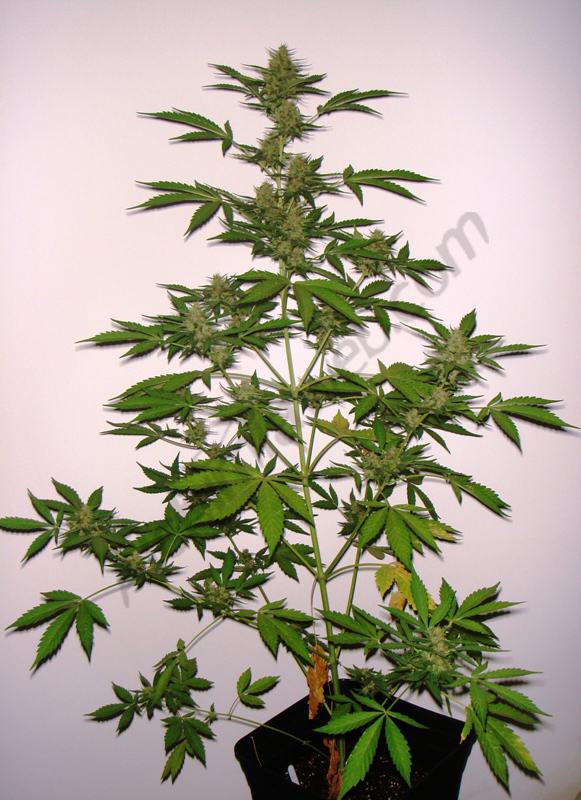
Their growth is regular and we can observe how plants grow a few inches every day during their vegetative period, which turns them into bigger, stronger and more robust plants. After these two weeks - during which watering is controlled so that roots expand better - we clearly notice the effect of this. Plants grow solidly and gracefully, and will be ready to enter the flowering period with a good structure for an abundant bud yield.
Flowering period of Mikromachine by Kannabia
The flowering period of autoflowering plants is much shorter than in regular cannabis, as the former only require about a month and a half or two months (at most) to complete the flowering period, from the germination of the seeds. In some cases, and depending on the crops, flowering can be shorter or longer. It basically depends on the strain and the environmental conditions during cultivation.

In this case, plants were grown during late June, July and August, when high temperatures and the strong sun help to create ideal growing conditions for autoflowering plants. This is both due to warm temperatures - that help the plant's growth - and the long sunny days with low rainfall, typical of this season.
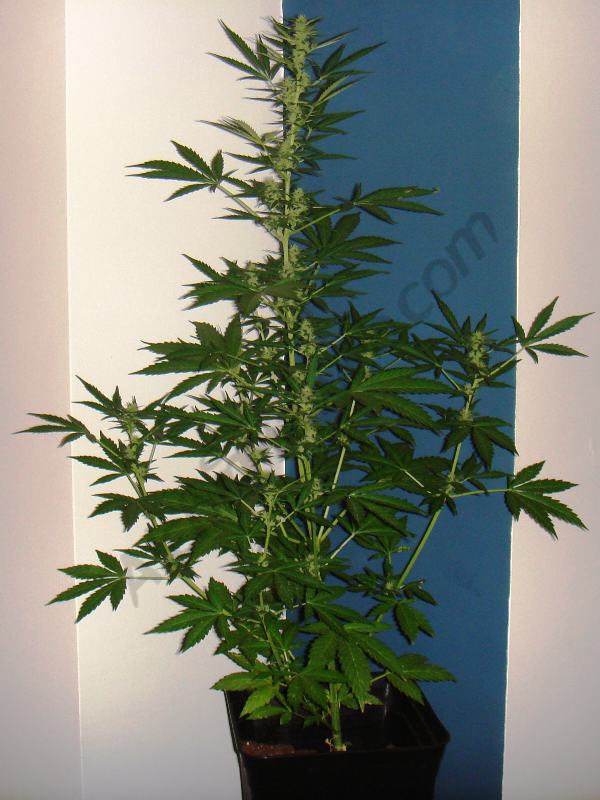
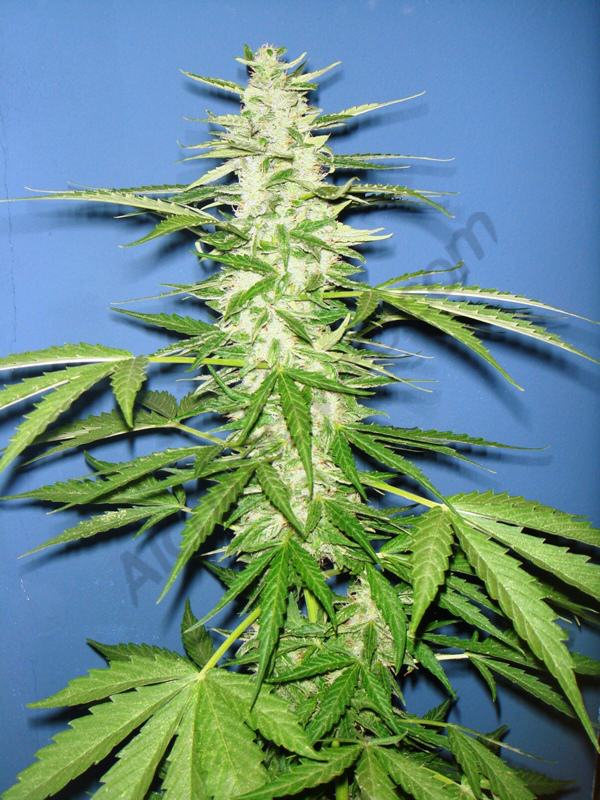
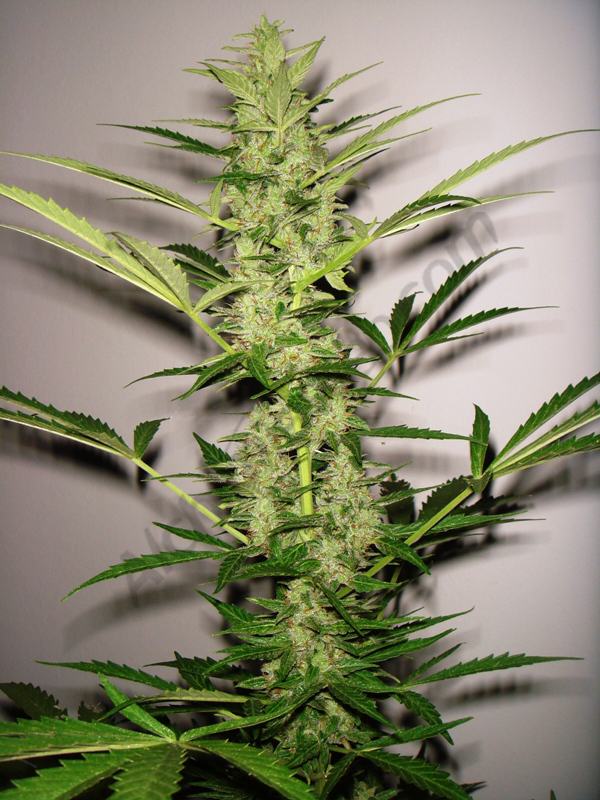
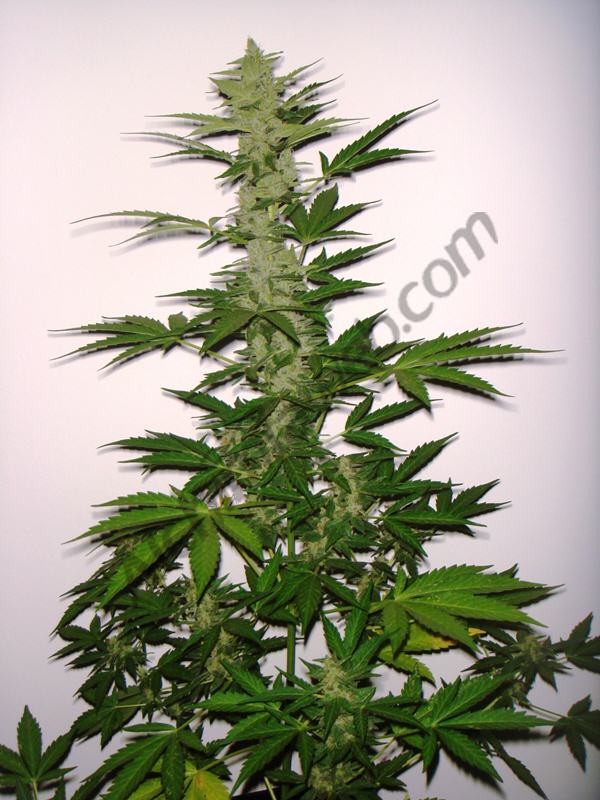
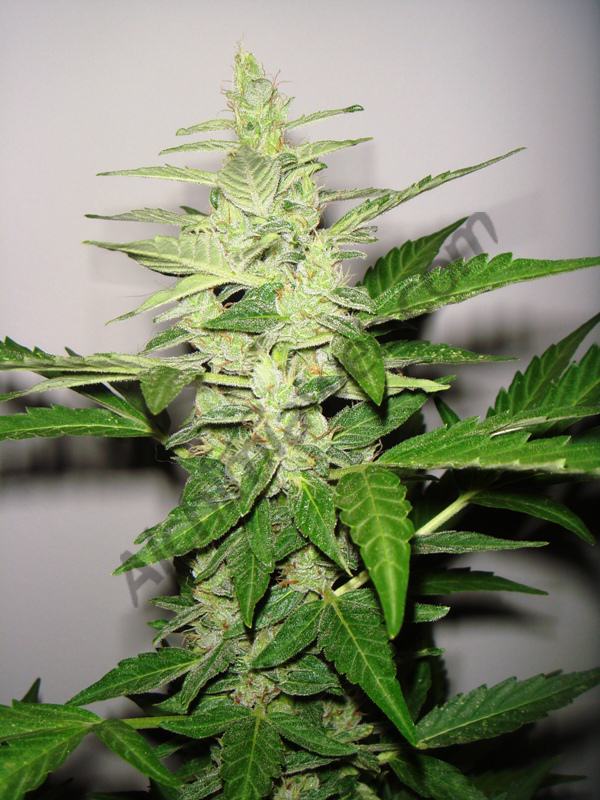
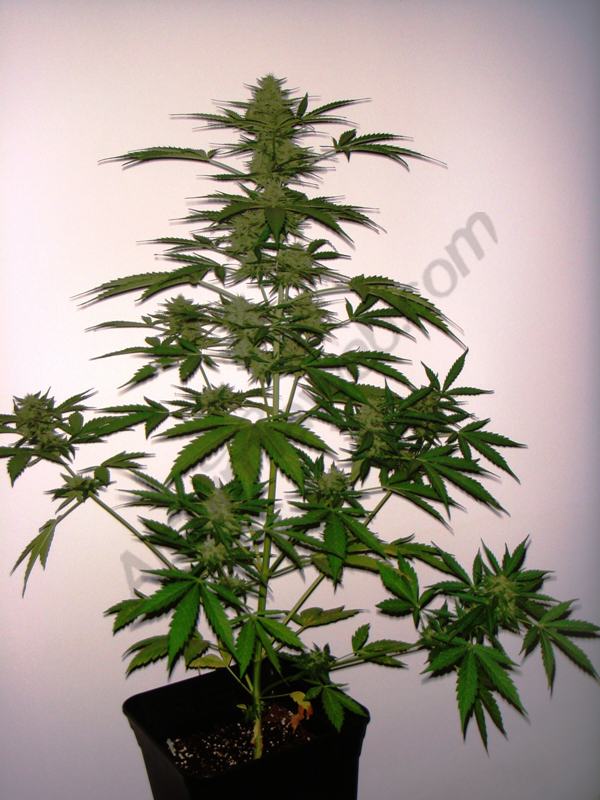
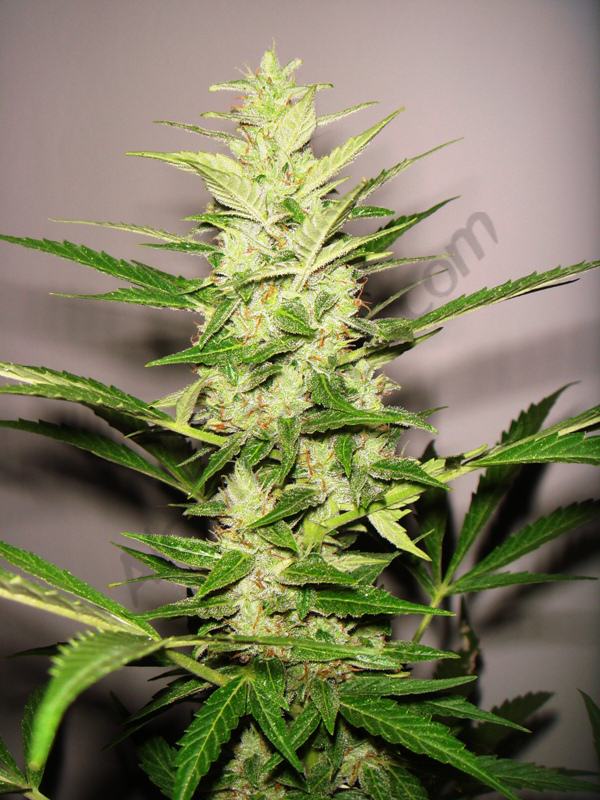
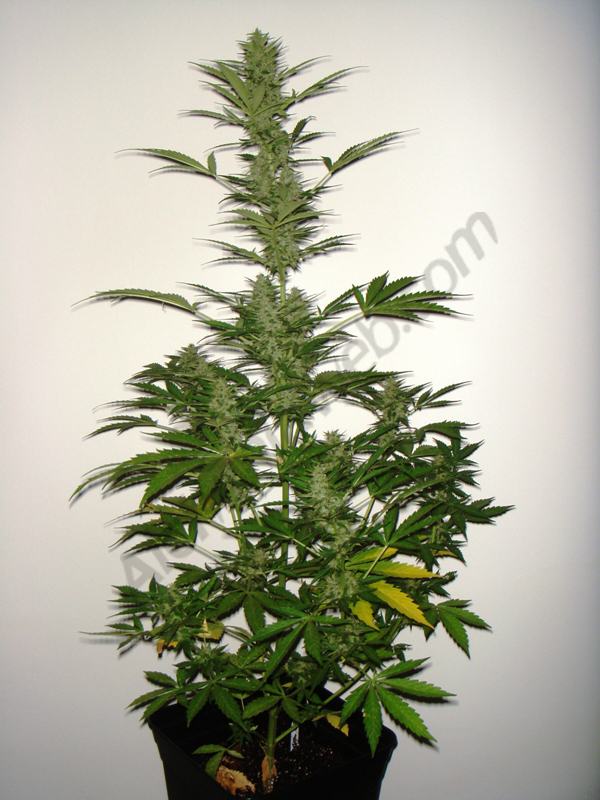
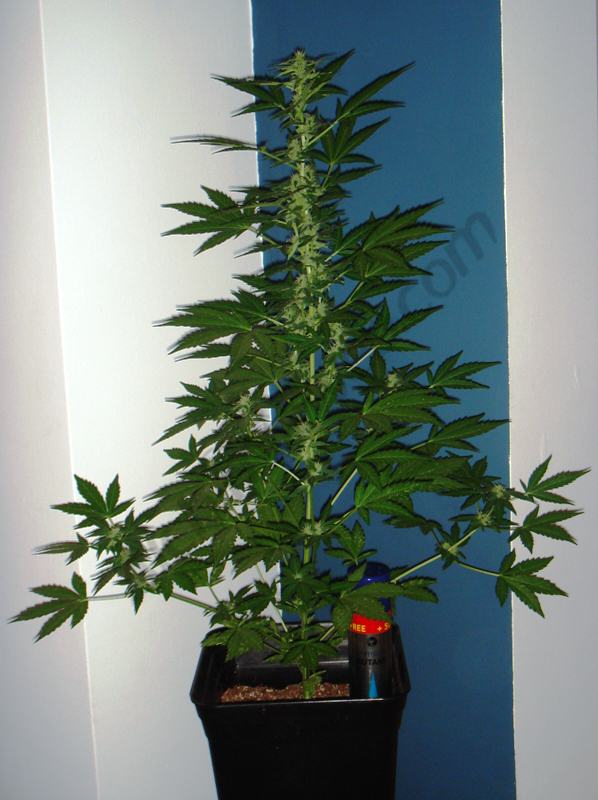
Once flowering has started, we can observe how the plants have a good structure that will allow them to produce big and thick high quality buds, as well as excellent yields. As we can see from the pictures, the plant structure is very similar in all individuals, but it's worth mentioning that you will later be able to distinguish two different genotypes.
The final height is around 80-90 cm, with a short internodal distance partly due to the additives used: Aptus Regulator, which makes plants more drought-resistant, also increasing significantly the cell wall and the internal stem diameter, thus reducing internode distances.
During the first week of flowering, by the end of the stretching period, you can easily see the first flowers on the tips of the branches. As weeks go by, we will increase the fertilizer dosage so plants have enough nutrients to prevent any stress caused by a deficiency or excess of nutrients.

It is important to monitor the levels of nitrogen present in fertilizers to prevent cannabis plants from an excess of this element, for they would produce lanky buds at the beginning of flowering. If this happens, flush the roots so that EC levels in the pot are appropriate for each stage of the plant's life.
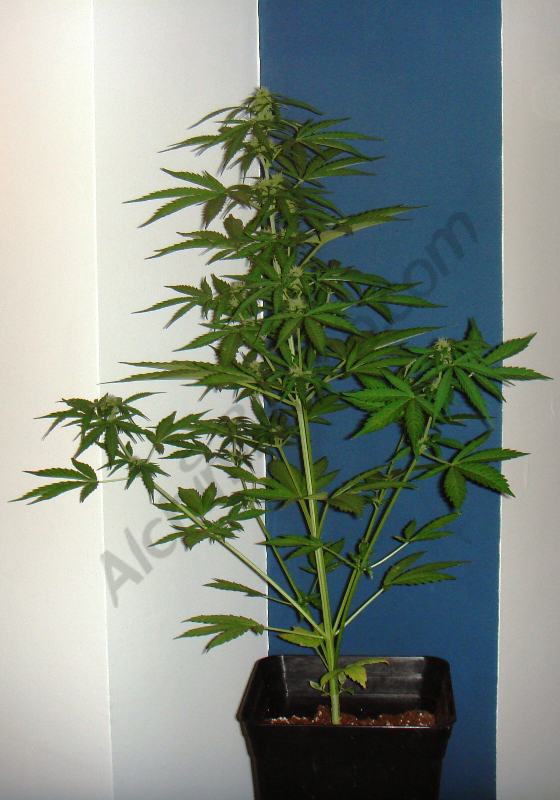
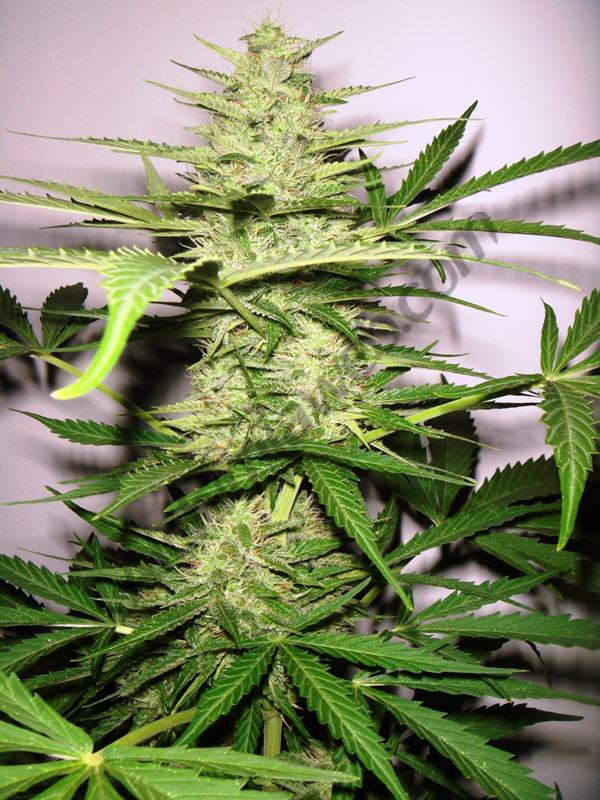
As you can see in the pictures, two plants are darker than the other two. In this respect, it is always better to feed our plants individually - according to their needs - in order to get the best possible quality.
If you want to water all your plants from the same tank, we recommend you to pay attention first to those plants that need more nutrients, so you prepare the appropriate nutrient solution into the tank, water the plants with more nutritional needs, and then dilute it with water, lowering the concentration of EC in the nutrient solution, and thus providing each plant with the right amount of nutrients, which are essential for optimal results.
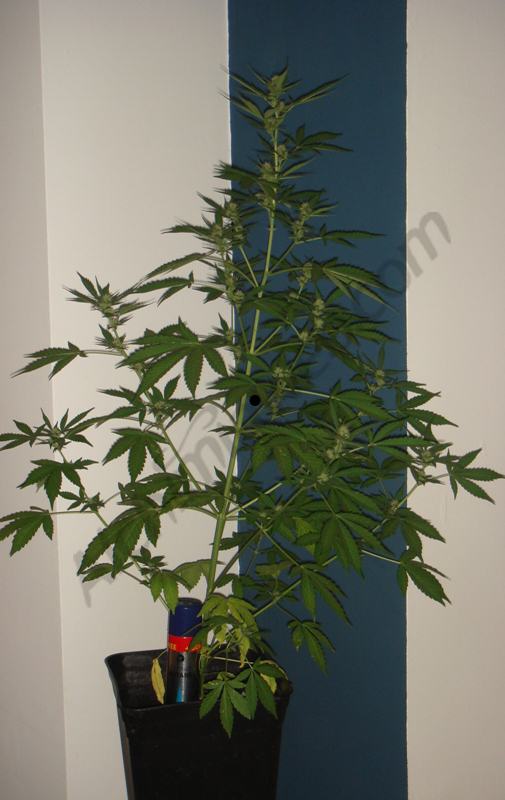
Week 4 into flowering
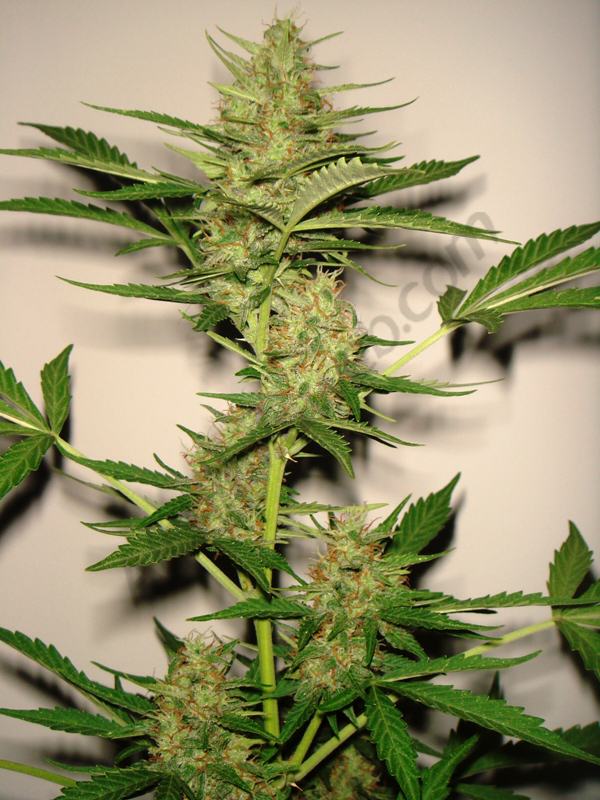
At the 4th week of flowering we can see how the flowers constantly gain weight, free from any pest that may affect their quality or yield. At the beginning of flowering, a small red spider infestation occurred, which was trated with Cinnaprot. This product and some neem oil leaved the plants free from any pest before flowering, protecting them from any other unwanted visitors.
The nutrient levels increase this week, according to the Aptus feeding schedule:

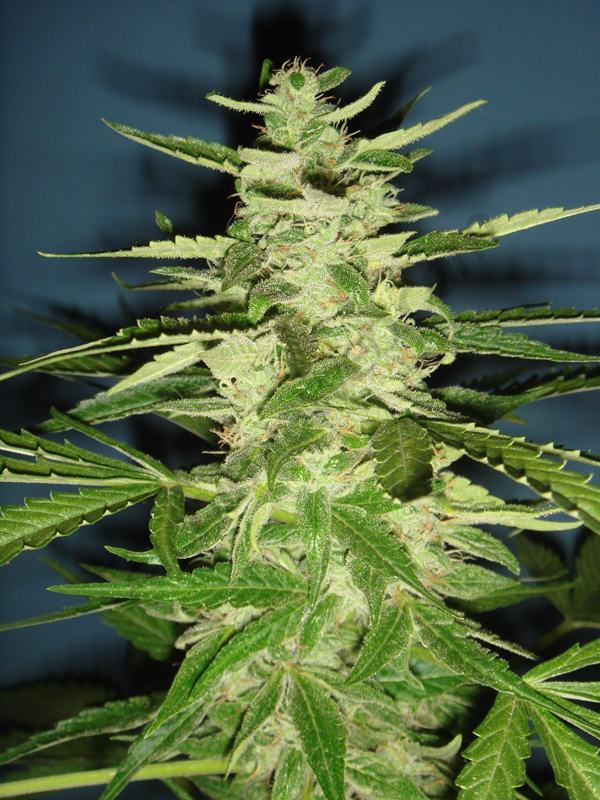
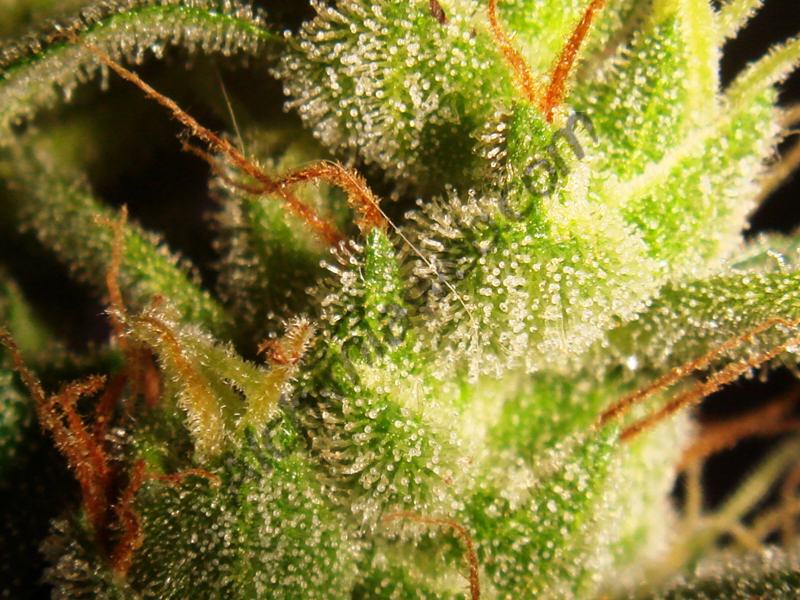
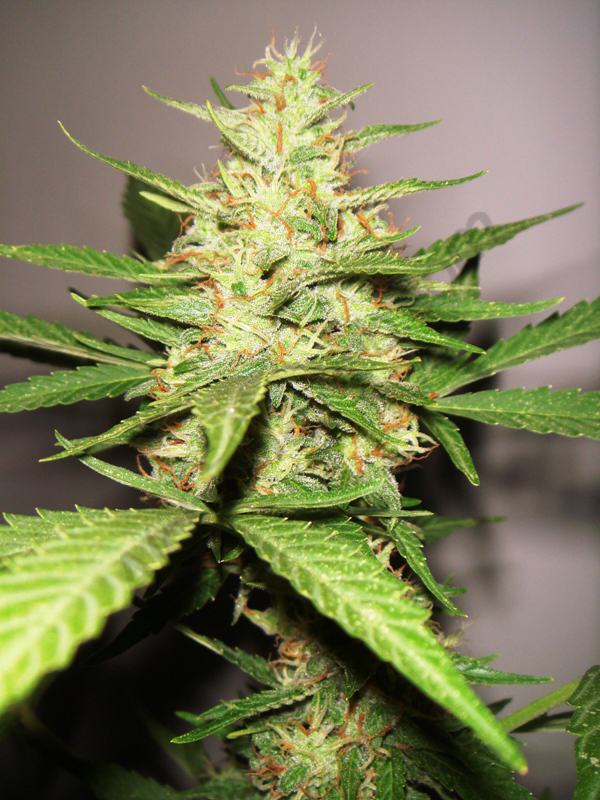
At week 5 of flowering, buds are well formed and ready to show their spectacular resin coat, full of THC. Flowers are compacting in all plants, regardless of phenotype. During this week, raise a little bit the nutrient concentration, for plants need to be loaded with nutrients in order to have enough food reserves to develop fat compact buds with the best possible organoleptic properties.
Continue adding flowering additives like Aptus Topbooster and Regulator until the last week of flowering, since humic and fulvic acids (and other acids) help the plants' buds ripening.
End of flowering in autoflowering cannabis

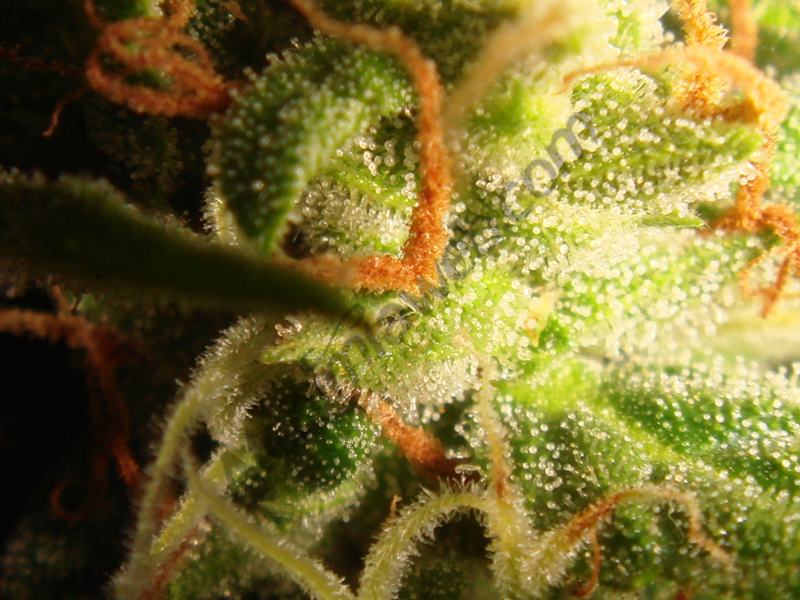
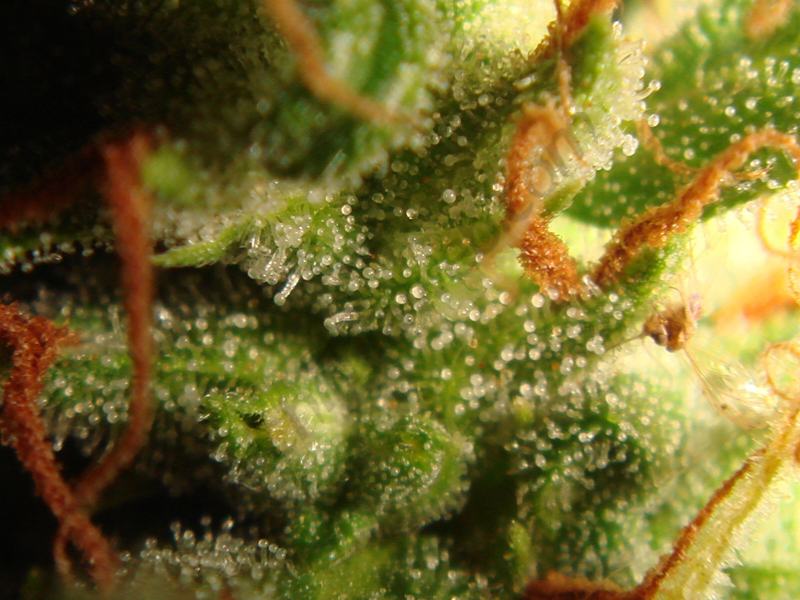
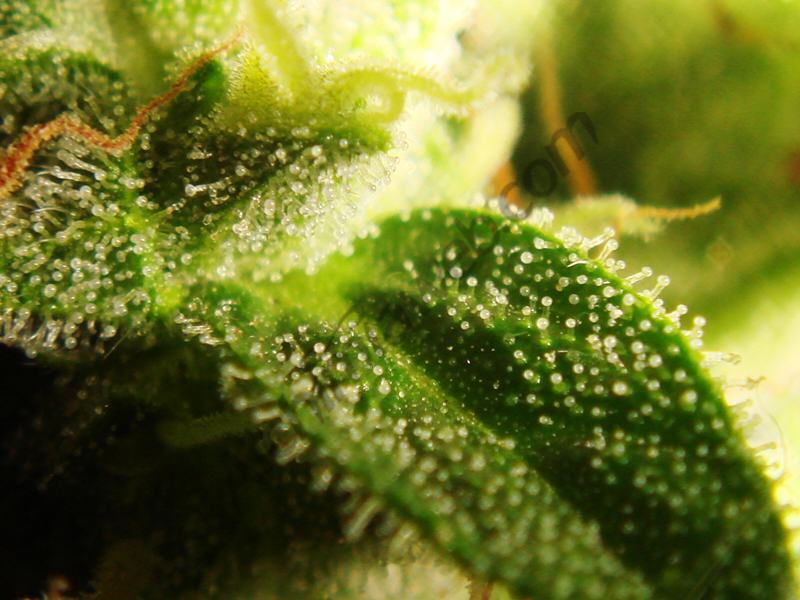
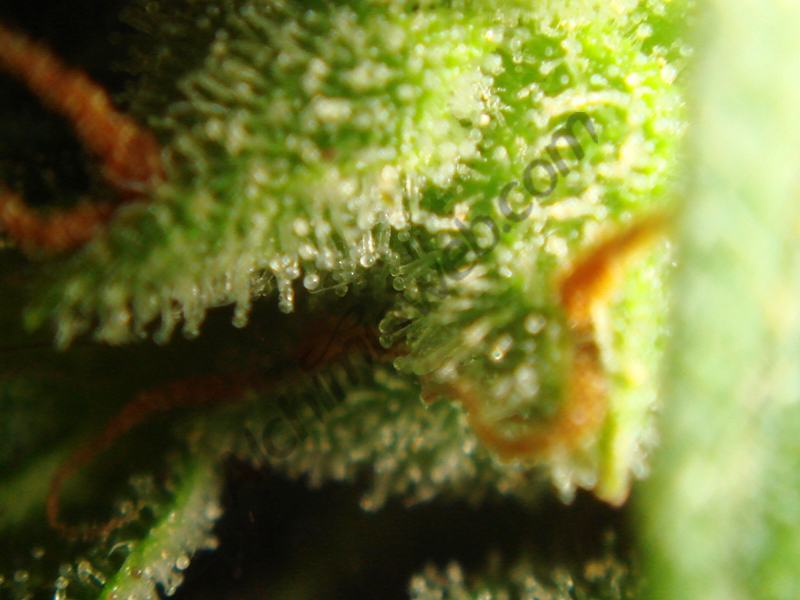
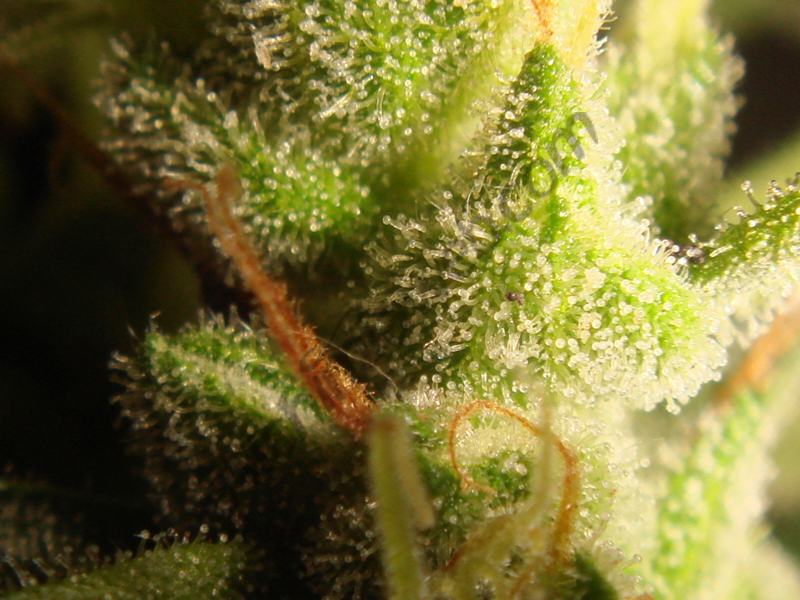
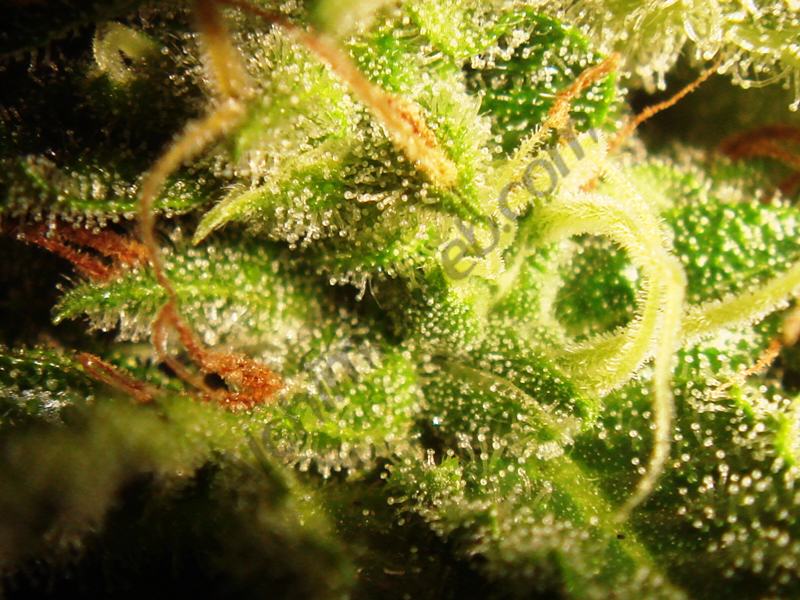
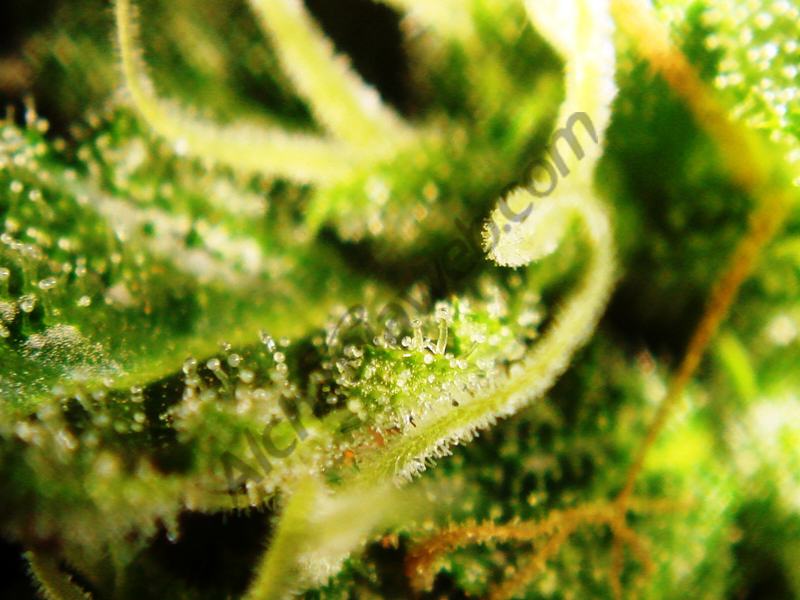
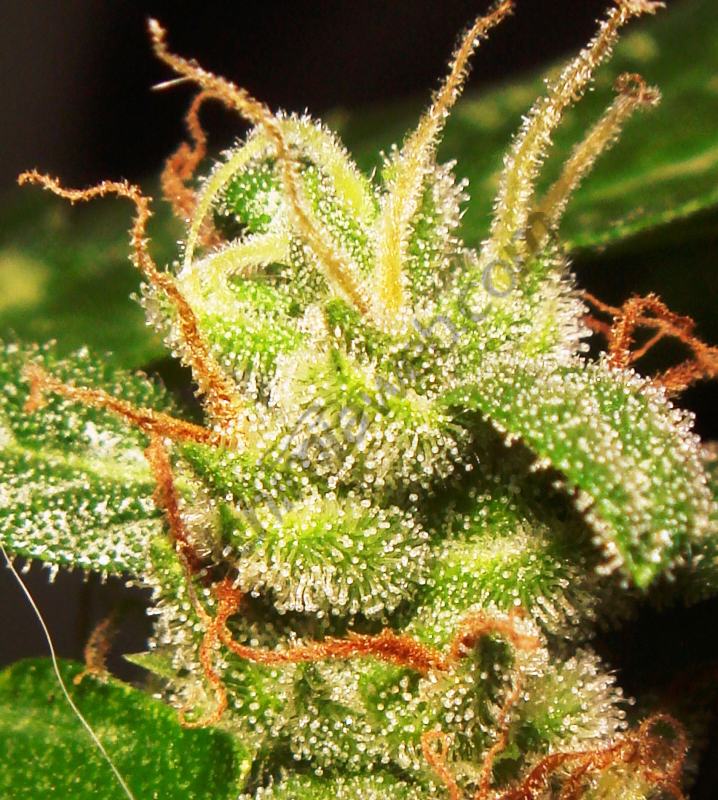
At week 6, one week before the last week of flowering, you should observe the trichome morphology to determine its maturity. Depending on how you see the trichomes through a 50 x magnifier glass, you can harvest the plant or wait a few days until it is fully ripe.
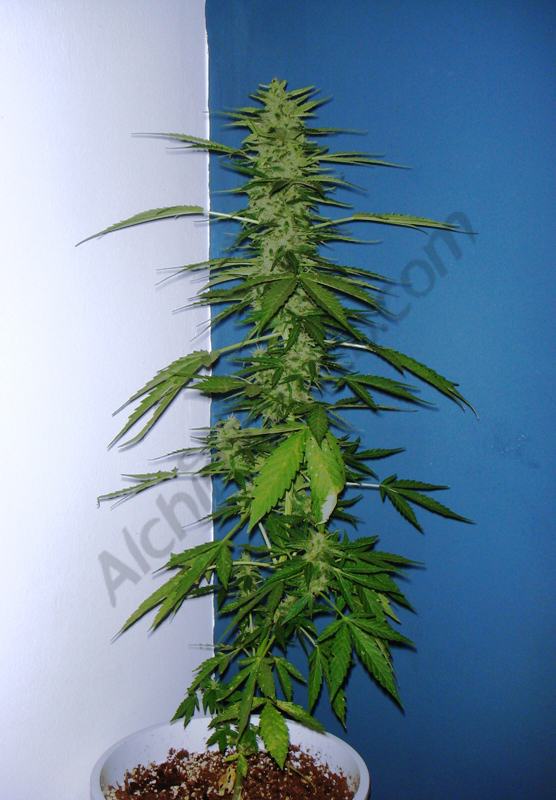
In this case, the Mikromachine strain needed 80 days from germination to harvest. During the last week, roots were flushed in order to reduce the concentration of nutrients in the substrate and to force plants to take nutrients from their own reserves, thus getting the best flavour and smell.
At week 7, the last week of flowering, you will clearly see how the buds are ripe. Many plants have the same bud colour, which has turned brown/orange, showing clear signs of maturity. You should check the trichomes again before harvesting your marijuana plants.
Throughout the flowering period, these plants have been victims of a bug that neem oil can't get rid of. We are talking about the fearsome caterpillars. They come from butterflies that lay eggs on the leafs. In ideal conditions, in this case around mid-August, when there is high humidity due to constant rain, we can observe this devastating specimen, the caterpillar.

As the pest appeared at the end of flowering, caterpillars were hand picked. Keep in mind that, when using any product that could leave traces on the buds, you should harvest your plants at least 15 days after any product application, for the flavour would be significantly altered and therefore not suitable for consumption.
After harvesting, the plants were dried in a drying tent with a carbon filter and an extractor to prevent any smell. When harvesting, the plant moves and the terpenes come off creating a coffee shop atmosphere. You can get rid of the smell by using filters or other effective devices like the Neutralizer .