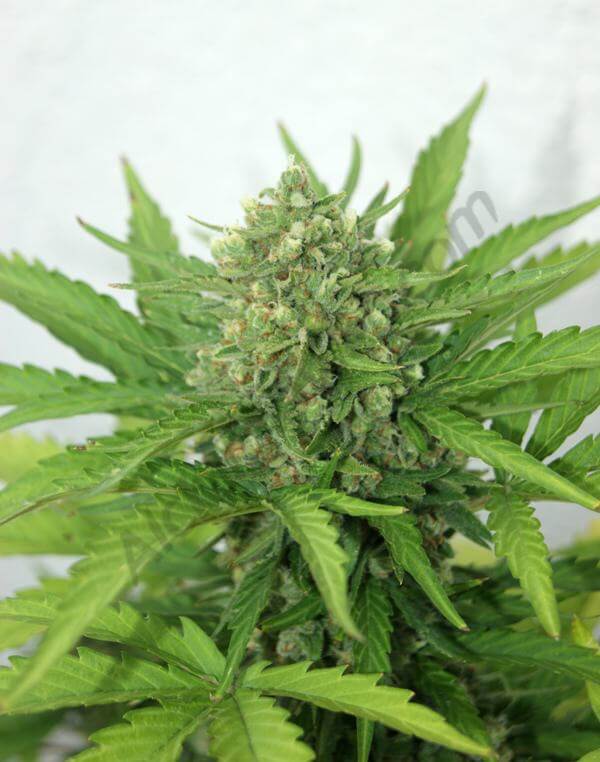
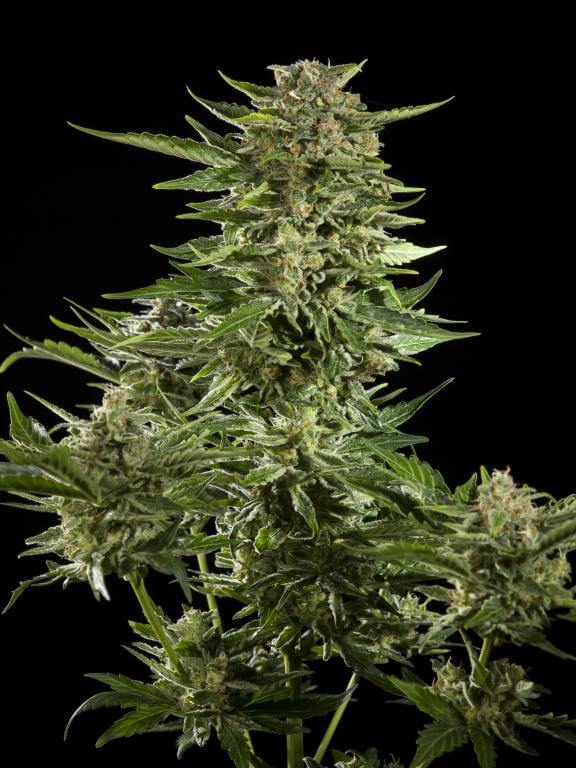
Seeds
Seeds


 Growshop
 Nutrients


 Extractions
 CBD
CBD
 Magic Mushrooms
 Headshop
List of contents
- Growing cannabis with automatic irrigation
- Manual or automatic irrigation in cannabis cultivation
- Drip irrigation in cannabis cultivation
- Setting up an automatic irrigation system
- Giving your automatic irrigation system the professional touch:
- How to use a pH pump
- Tips and tricks when using a pH pump
- EC Control Pumps to stabilise nutrient levels
Growing cannabis with automatic irrigation
Cultivating cannabis is an art in which each grower uses their best techniques and their own knowledge, as well as different growing apparatus that can help to manage the growing environment or as in this case, the automatic irrigation of cannabis plants.
The duration of a cannabis crop is around 3 months, with the first month for the plants vegetative growth and at least the next 2 months for flowering. During this time plants require water and fertilisers every few days, so irrigation will become a repetitive task that can end up tiring all but the most dedicated grower, especially when time is at a premium.
Manual or automatic irrigation in cannabis cultivation
Pretty much every grower starting out in cannabis cultivation will usually irrigate by hand, but how can we simplify this task?
Many growers prefer to water by hand and can be a bit reluctant to adopt automatic irrigation systems, but when you use one for the first time there's no turning back. Automatic irrigation gives us more free time to check the plants or to dedicate to other tasks.
Automatic irrigation can be as simple or as complex as we like, depending on the requirements of each grower and the aspects that they want to control, such as the pH or EC. Watering each plant with the same amount of water, using short waterings will mean that the plants will feed well while maintaining a high degree of oxygenation in the roots and preventing the plants from the extremes of drying out or being flooded with water.
Let's see how automatic irrigation can work with cannabis:
Drip irrigation in cannabis cultivation
Automatic drip irrigation is the simplest and most useful method, as well as the easiest to control, because apart from being able to assemble it to fit according to necessity, there's also the possibility of being able to use adjustable drippers for when certain plants drink less than others.
The versatility of this type of irrigation
is what makes it an option well worth considering. There is a wide range of products that can be adapted to the needs of each grower, factors such as; number of plants, cultivable m2, vertical wall irrigation, amount of irrigation per minute, adjustable flow, etc.
Let's see an example:
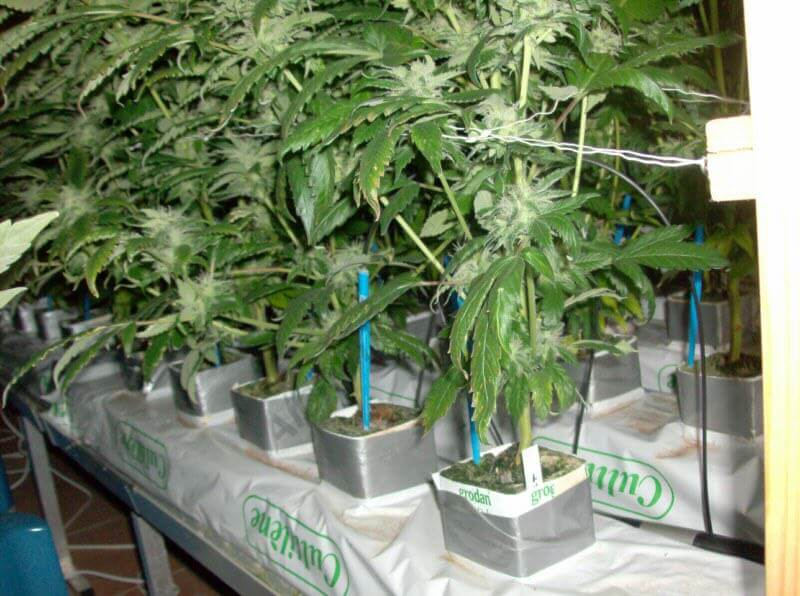
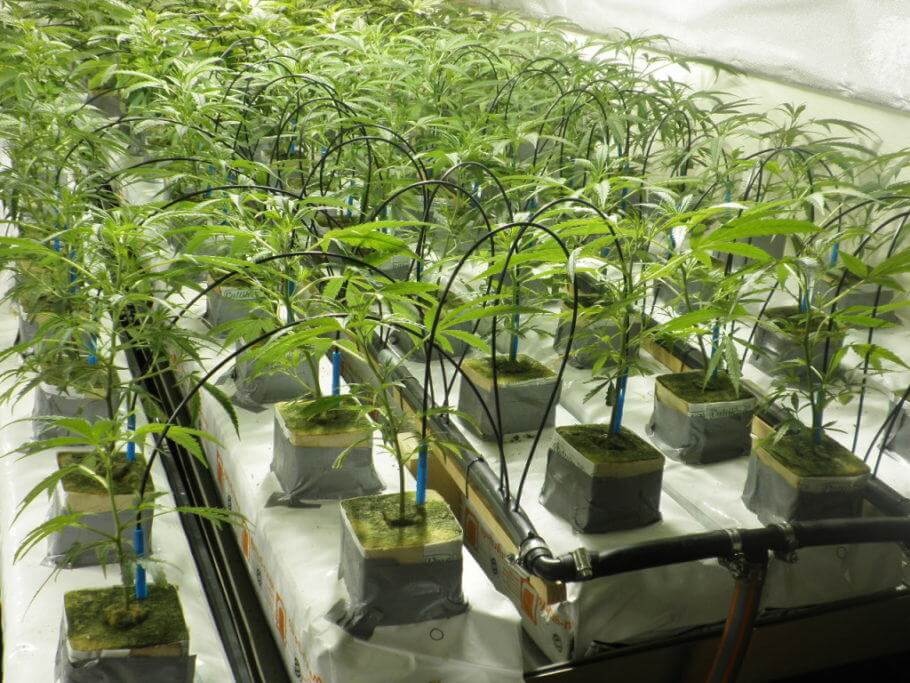
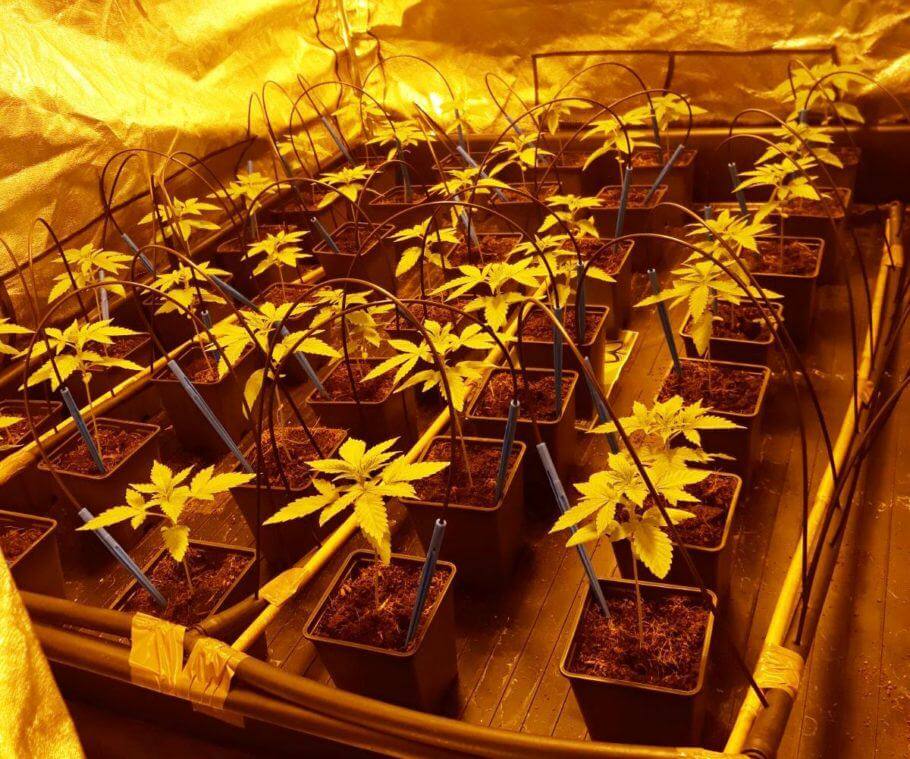
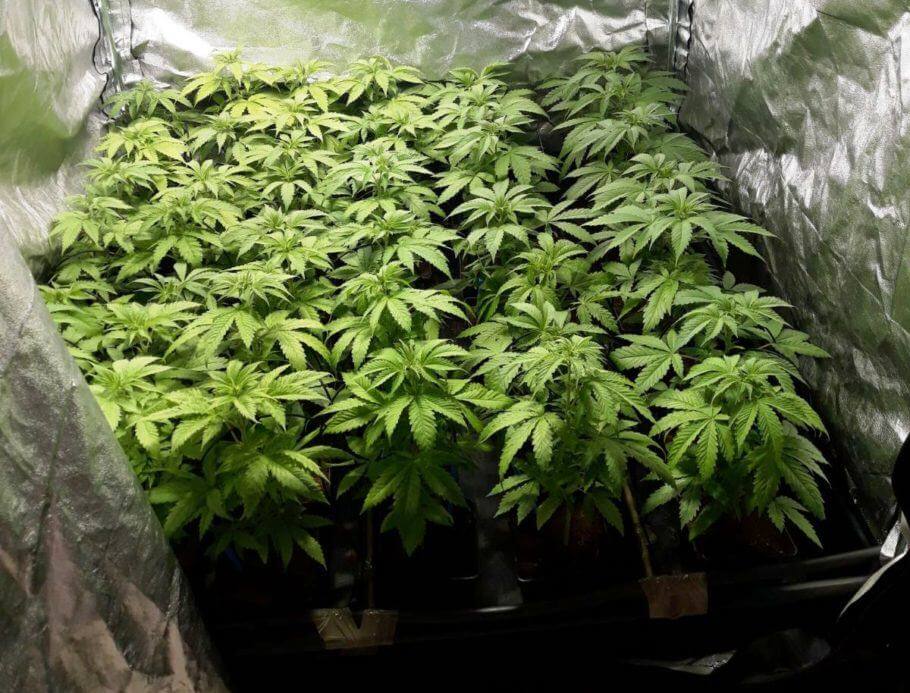
In this case, a SOG grow has been carried out, in which 36 plants per m2 have been cultivated in a mounted irrigation system using the following components:
1- Irrigation tube 16mm
2- Elbow connectors 16mm
3- End caps 16mm
4- T connectors 16mm
5- Hose 16mm
6- Water pump 700l/h
7- Drippers 40ml/min
8- Digital timer programmable minute by minute
9- Nutrient tank 90L
10- Grow tray with drainage
11- Air pump with diffusor stone
In the photo you can see an even growth over all the plants by having a balanced diet and accurate watering during the vegetative stage. In this case, there was an initial watering of 30 to 40 seconds, started manually, and later automated using a digital timer, in order to regulate the amount of water and nutrients as much as possible.
The root development of these plants is explosive and their growth is vigorous since the beginning. This vigor is due to a degree of humidity and stable dryness of the substrate during the vegetation phase. In this case trichodermas have been used to have a greater and faster colonisation of the root zone, in addition to improving the ion exchange between substrate and root for better assimilation of nutrients by cannabis plants.
In this setup, the irrigation water has been drained away, meaning it is not recovered and reused once it has left the nutrient tank. Coco fibre, clay balls, rockwool and in general all hydroponic substrates can be used in recirculation, but it is preferable to drain the solution to avoid altering the nutrient solution in the tank, in particular with coco fibre, rockwool and soil .
If we recirculate in rockwool or clay pebbles, when we water, the runoff that escapes from the drainage holes at the base of the pot can dissolve salts deposited on the pot or grow tray. If these salts are washed back to the deposit they can raise the EC and disrupt the pH levels.

The same thing applies to soil or coco, it's better to irrigate to drain than to recover the runoff, as the salts could upset the stability of the nutrient solution in the deposit, which will later affect the plants. Moreover, small particles of substrate can clog the water pump or the irrigation tubes.
Setting up an automatic irrigation system
To begin to assemble the automatic irrigation, we need to be clear about the space that the crop will occupy and the number of plants to be cultivated, to help us estimate the size of pump needed, the quantity of drippers and the layout of the main and secondary branches of the irrigation pipes, as well as and where to make the joints with the elbows and T- connectors.
We're going to use a common case as an example, in which 16 plants per m2 are in 7L pots with soil as the substrate. What materials are required and how is the space arranged for the irrigation inside a 1.20m2 closet?
First of all we have the 1.20m x 1.20m grow tent with a 1.20m2 cultivation tray and 16 plants and a 90L tank, which can be left outside or placed inside the tent underneath the tray. If there's enough space, and to facilitate filling the tank, it's better to leave it outside of the grow tent, if there isn't enough space in the room, we can fit it inside the tent.
Now that the tray and the tank are in place, we can look at the distribution of the pots and a sketch of how the irrigation system should be set up. In this case we already mentioned that we will have 16 plants per m2 and the most logical way to fit all 16 plants in is to use 4 rows of 4 plants each.
Layout sketch of an irrigation system for 16 indoor plants
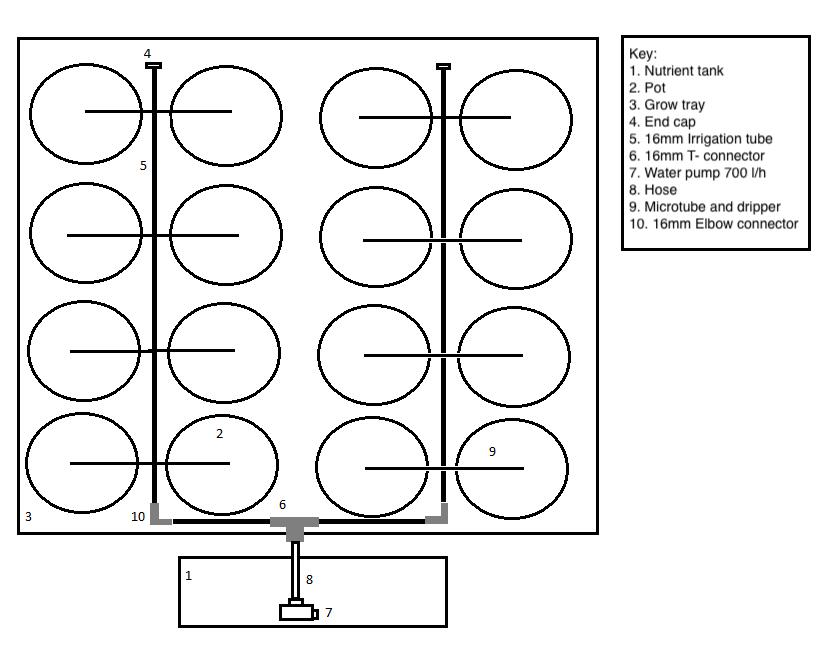
In this example, as we can see in the sketch, there are 16 pots, with 4 rows of 4 pots. What we will do is use a main line and two secondary lines to feed the drippers, which will be anchored in the cultivation pots. Let's see how to assemble the irrigation system step by step.
The main line: This is an irrigation pipe, in this case 16mm, which is attached to the pump located inside the tank. To connect the main line to the pump a piece of hose of 16mm (same size as the irrigation pipe) and a connection T has been used to connect the right and left sides of the main line and. The main line runs, in this case, horizontally so that the secondary branches go vertically.
Secondary lines: These are irrigation pipes, also 16mm, branches connected to the main, horizontal line. The number of secondary branches depends on the number of pots and how they are distributed in the grow space. In this case, only two secondary lines are required, which each feed two rows of pots, a total of 8 pots per secondary line. To connect the secondary branch to the main line, we can use elbows or T connectors, in this case we need 2 16mm elbow connectors.
End cap: The final stopper as its name indicates is a cap that is fitted, normally, at the end of the secondary branches to avoid water leaks and to create the water pressure that allows it to exit through the microtubing and dripper stakes.
Water pump: In this case 700l/h is enough to feed the 16 pots of the grow. When selecting an irrigation pump, apart from the flow rate in litres per hour, it is necessary to take lift into account, which is the amount that the pump has to move the water vertically. If we have are growing at at ground level there is no problem but if it is more than 1 meter high we have to look for a pump that has a lift strength of 1.5m. The pump attaches to the hose to be push the water through the drippers.
Microtubing and drippers or stakes: The part that connects the secondary branches with the plants. The microtube allows a restricted water passage of between 40 to 60ml per minute to perfectly control irrigation. The drippers or stakes are attached to the microtubing, by means of an internal thread that connects them, and are driven into the substrate in the pot to allow the water to reach the plant.
Digital timer in minutes: A digital timer that allows us to control irrigation with a minimum time of 1 minute and a maximum of 24 hours. This timer is responsible for starting and stopping the irrigation pump automatically, according to the users settings.
Air pump and stone diffuser: An air pump that takes air from the room and pushes it through a non-toxic silicone tubes to the stone diffuser. The diffusing stone is responsible for spreading the air in small bubbles inside the nutrient deposit, and keeping the nutrient solution oxygenated and in good condition.
Water heater: a simple water heater allows you to maintain an optimal temperature for the nutrient solution, around 20ºC.
Nutrient tank: It is a water tank in which the mixture of nutrients is made to be able to irrigate by automatic irrigation.
Giving your automatic irrigation system the professional touch:
There are many other grow devices that can make a conventional irrigation much more professional. It's possible to further automate the irrigation and to make it more complex, which consequently allows better management of the irrigation and the dosing of fertilisers, greatly improving the final result. In this case we're talking about pH and EC Pumps.
How to use a pH pump
A pH pump is a cultivation tool that allows us to automatically control the pH of the nutrient tank for maximum convenience. The pump consists of a probe that is continuously reading the pH of the nutrient solution and depending on the resets assigned by the user, the pump will raise or lower pH levels as required.
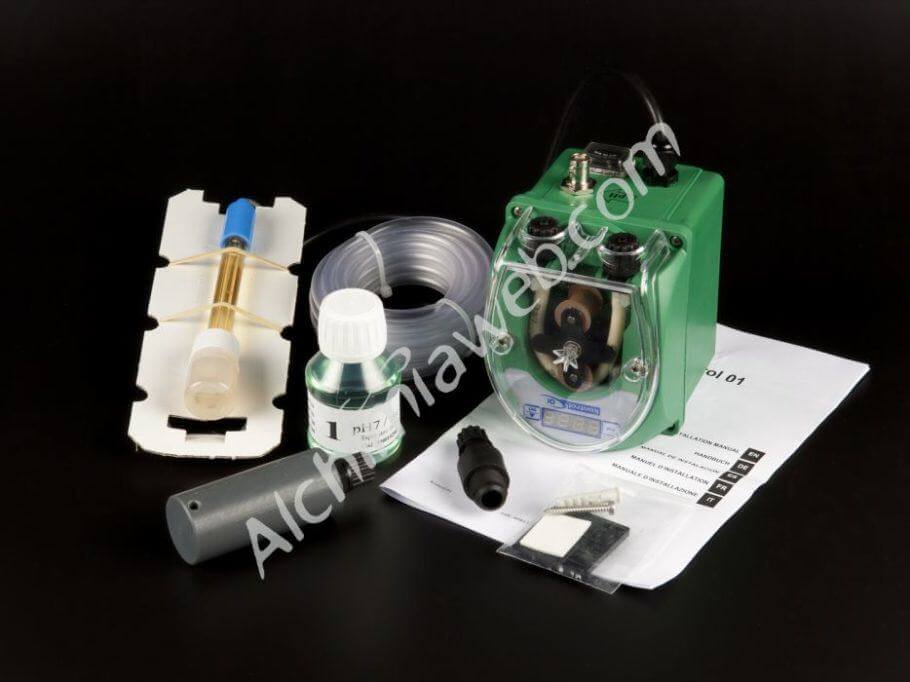
As we can see in the photo of the Kontrol 01 pump, it is a square unit, containing the mechanism in charge of slowly and gradually pumping pH down acid (mixed with water) to the nutrient tank via a non-toxic silicone tube. The pump works by taking water with a very low pH from a bottle, or another tank, which it then pumps to the nutrient tank, where the pH is high.
The pump relies on readings given by a probe to monitor the pH level of the nutrient solution in the tank. The unit activates automatically and will continue pumping until it has lowered the pH to the level indicated by the user.
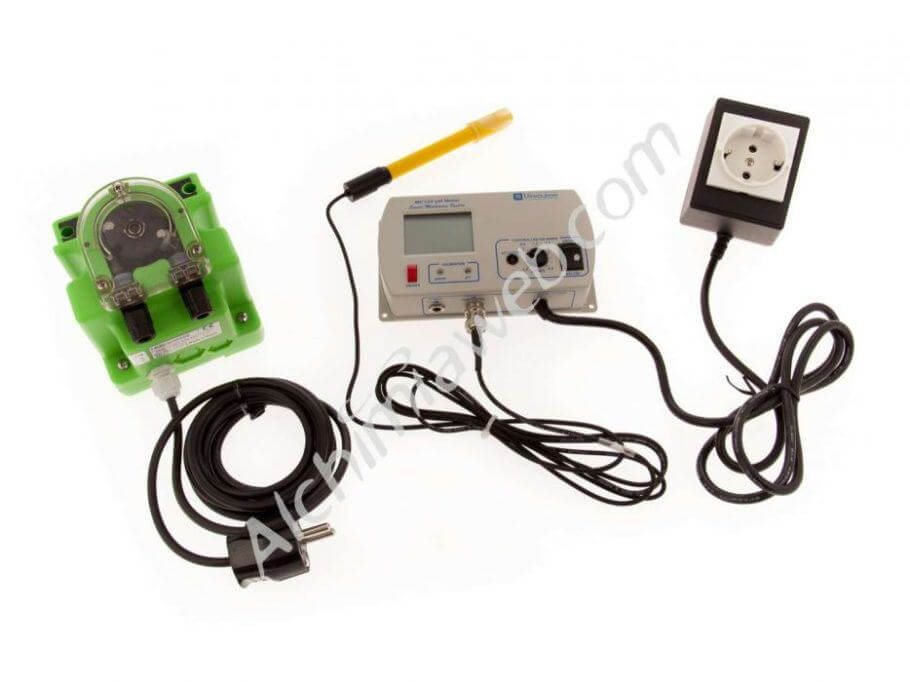
There are two types of pH pumps: one that incorporates a probe within the pump itself, independently monitoring the pH in the tank; and the second type, that need to be connected to a continuous PH meter as in the case of the Milwaukee MC720 pH controller with pump. If we already have a continuous pH meter, we need only buy the pump, which is always a little cheaper than the other available option, as in the case of the Kontrol01 pH pump.
When growing in soil, normal pH is between 6 and 7. If the pH must be lowered, we can use an acidic liquid, such as PH Down from GHE or Citric Acid from Trabe to lower the pH in the tank. The same thing applies when growing in coconut, clay balls, rock wool, aeroponics, or in DWC.
Tips and tricks when using a pH pump
When using a pH meter that continuously monitors the levels, the pH readings are always active so if levels get high enough, the pump will keep adding acid to raise the tank to the correct level. As we are dealing with irrigation to drain, rather than recirculating, we can avoid the pump working all day and continually wasting pH down in the solution by setting the unit to only regulate the pH for a few minutes before the irrigation pump is turned on to feed the plants.
To perform this task, we need only add a timer switch to the pH pump programmed to turn on 15 minutes before the irrigation pump does and to deactivate just before watering.
An example of this method would be, if we water once a day at 15:30, we set the timer so that it will activate the pump from 15:15 to 15:30. During this time the pH pump works to stabilise the pH at the indicated level and then switches off. This operation is automated throughout the grow, removing the need to regulate the pH every time we water.
It should be noted that in hydroponic systems such as coco fibre, where a large number of short irrigations are used per day, this is a very good option to have the pH always under control, resulting in a heavier, higher quality harvest thanks to the high stability of the pH from the start to the finish of the grow.
EC Control Pumps to stabilise nutrient levels
También existen bombas controladras de EC que hacen la misma función mantener una Ec estable durante todo el cultivo, ideal para los sistemas de recirculación donde la misma solución nutriente realiza una y otra vez el mismo circuito alimentando las plantas diariamente.
En el circuito cerrado las plantas se alimentan de la Ec del depósito de modo que la EC del mismo se va reduciendo a medida que las plantas se van alimentando. Es en estos casos donde también es imprescindible el control de la Ec.
There are also EC control pumps that do the same function to maintain a stable EC throughout the grow, ideal for recirculation systems where the same nutrient solution makes the same circuit again and again feeding the plants daily.
In a closed circuit, the plants feed on the nutrients in the tank, meaning that the EC levels are gradually reduced as the plants are fed. It's in these cases that controlling the EC is essential.
We hope this article encourages you to set up your automatic irrigation system, you'll only have to work a few hours to save lots of time in the future and get better results! Do not hesitate to leave here your doubts and comments, we'll be pleased to reply them.
Happy growing!