


DaVinci IQ2 Vaporiser. Alchimia video tutorial
The DAVINCI brand has released the new version of its IQ portable cannabis vaporiser, the new DaVinci IQ2 and in this Alchimia tutorial we’ll see how it has evolved, as well as how to use it. Th [...]
 Seeds
Seeds
 Growshop
 Nutrients
 Extractions
 CBD
CBD
 Magic Mushrooms
 Headshop


The DAVINCI brand has released the new version of its IQ portable cannabis vaporiser, the new DaVinci IQ2 and in this Alchimia tutorial we’ll see how it has evolved, as well as how to use it. Th [...]

This is the 3rd in our series of video tutorials on “Selecting a Mother plant”. On this occasion we’ll focus on the process of sexing the plants, with the objective of separating the [...]
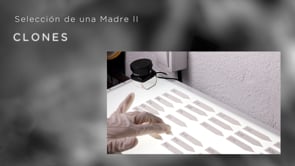
In this, the 2nd in the “Selecting a Mother” series of Alchimia tutorial videos, we focus on asexual reproduction techniques. We explain how to select new mother from clones (cuttings) tha [...]
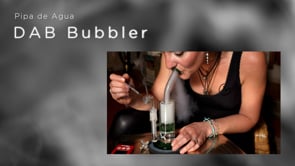
How do we consume Rosin extractions? Here we present a tutorial on how to use a water pipe or electric nail, using the cannabis concentrates from our own homegrown harvest. Without a doubt, the Bubble [...]
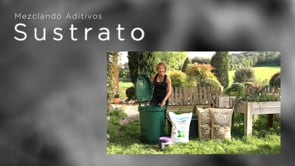
In this Alchimia tutorial we prepare a mix of soil amendments to make the best substrate for an indoor home grow space. Whether we grow indoors or outdoors, using a good substrate is a crucial if we a [...]
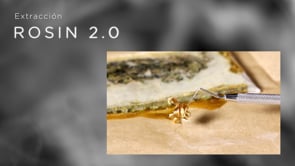
Marihuana extracts are becoming more and more popular in the cannabis community. Today we’ll see the best techniques for making Rosin cannabinoid extractions from our homegrown harvest. We talk [...]
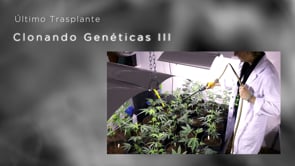
Here we have the 3rd and final video in our series of Alchimia tutorials called “Cloning Genetics”. Now we’re at the last part of the process of cloning genetics, we’ll show yo [...]
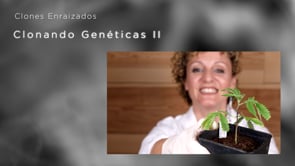
This is the 2nd part of our Alchimia tutorial “Cloning Genetics”, in which we explain the necessary details to properly transplant once our Cannabis clones have rooted. Alchimia Growing H [...]
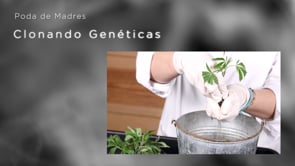
This is the first in a series of Alchimia tutorials about “Cloning genetics”. In this video we’ll explain how to take clones from our favourite Cannabis genetics, with special attent [...]
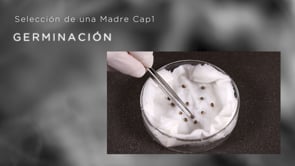
This is the first in a series of Alchimia tutorials where we will show you the necessary steps to select a good Mother plant, from Regular seeds. In this first video we will focus on germination. Alc [...]
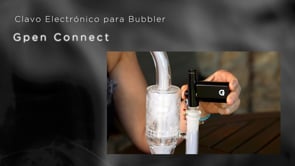
We present the new GPEN Connect electronic nail. G Pen is a vaporiser brand aimed at consumers of cannabis resin concentrates. The GPEN Connect portable e-nail is innovative, efficient and easy to use [...]

Here at Alchimiaweb.com we present this revolutionary new automatic OTTO Grinder/Rolling Machine, from Banana Bros. The OTTO Automatic Grinder/Roller, which has Artificial Intelligence, perfectly gri [...]
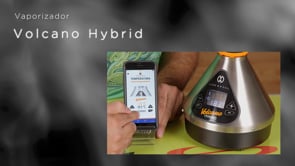
Alchimia videotutorial in which we present the “new” Volcano HYBRID tabletop vaporiser from the prestigious brand Storz & Bickel, with a detailed explanation of its operation and the u [...]
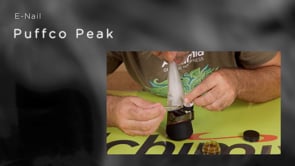
New Alchimia videotutorial in which we show you how to use the high quality, portable e-nail DAB rig Puffco Peak and its bubbler, with which you can enjoy your cannabis extracts and concentrates (Rosi [...]
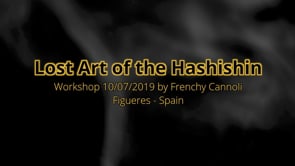
On 10th July, 2019 Frenchy Cannoli is coming all the way from California, USA to present his Master Class "Lost Art of the Hashishin (Workshop)". This workshop is sponsored by Alchimiaweb and in it Fr [...]
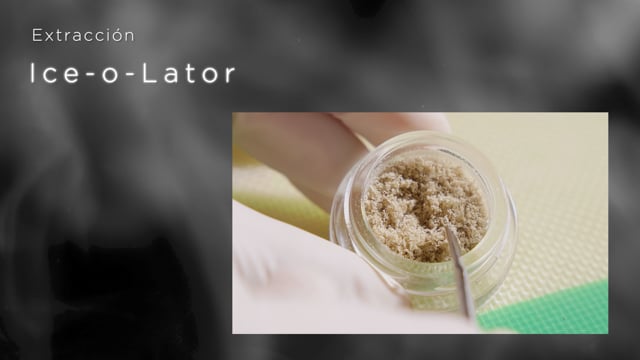
In this new Alchimia Video tutorial, we show you in great detail how to properly carry out a hash extraction with ice and water. With this type of cannabis resin extraction we can obtain a very high q [...]
